 Benny Tritsch
20 Apr 2026
Benny Tritsch
20 Apr 2026
About a year ago, I described in an article how to use frame grabbers for screen recordings. Now it's time to document the corresponding integration and configuration of the free recording software OBS Studio. Only the combination of frame grabber and recording software completes the solution for capturing user experience.
The following configuration instructions require a sufficiently powerful "recorder PC" and, of course, the installed OBS Studio software. Here is the OBS Studio download path. In addition, a frame grabber must be connected to the recorder PC and the corresponding driver must be installed. Checking the Device Manager on Windows can confirm whether this is the case. This article uses an AVerMedia Live Gamer 4K capture card as an example.
IMPORTANT: The settings presented in this article are used in benchmarking tests with EUC Score. Other use cases may, of course, require different settings.
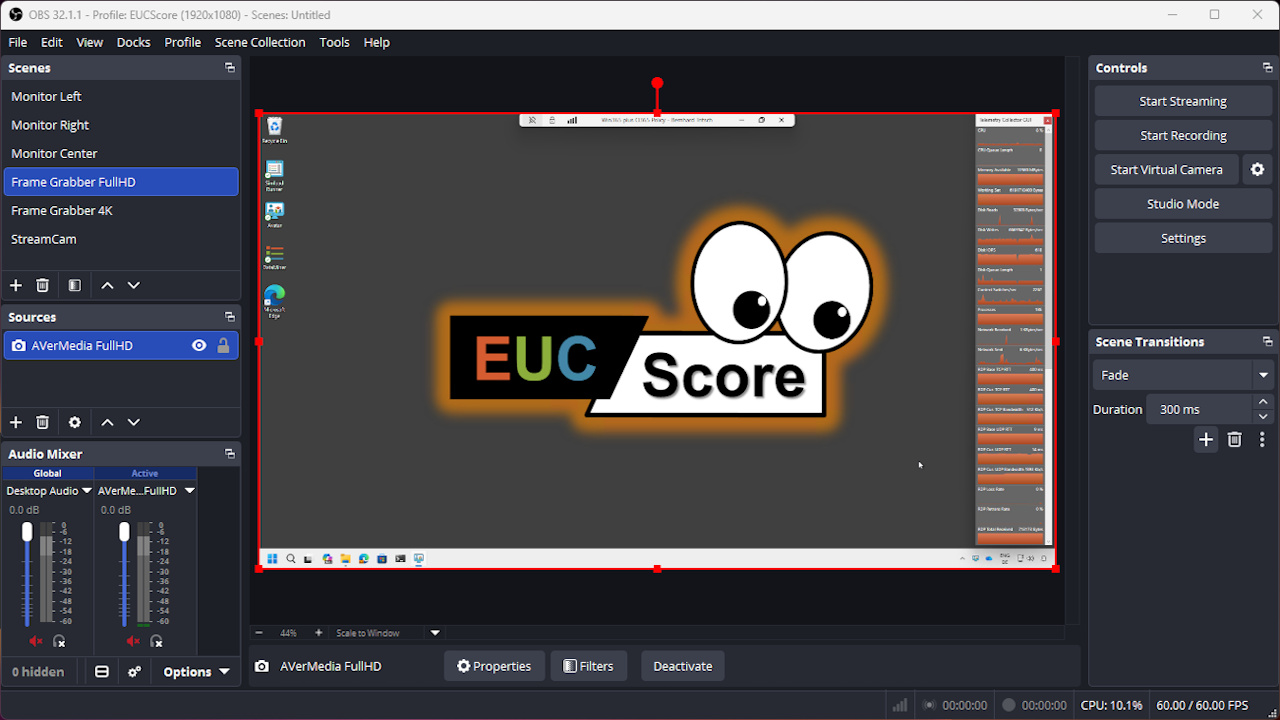
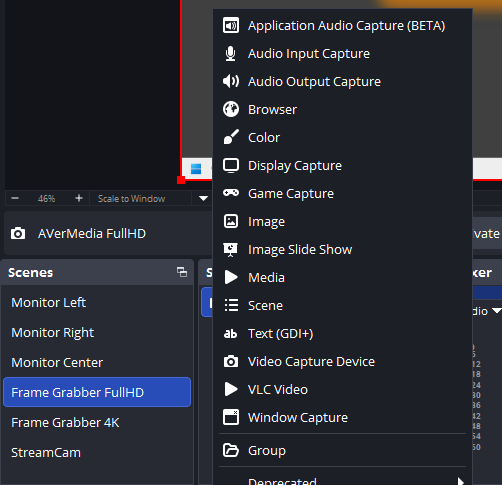
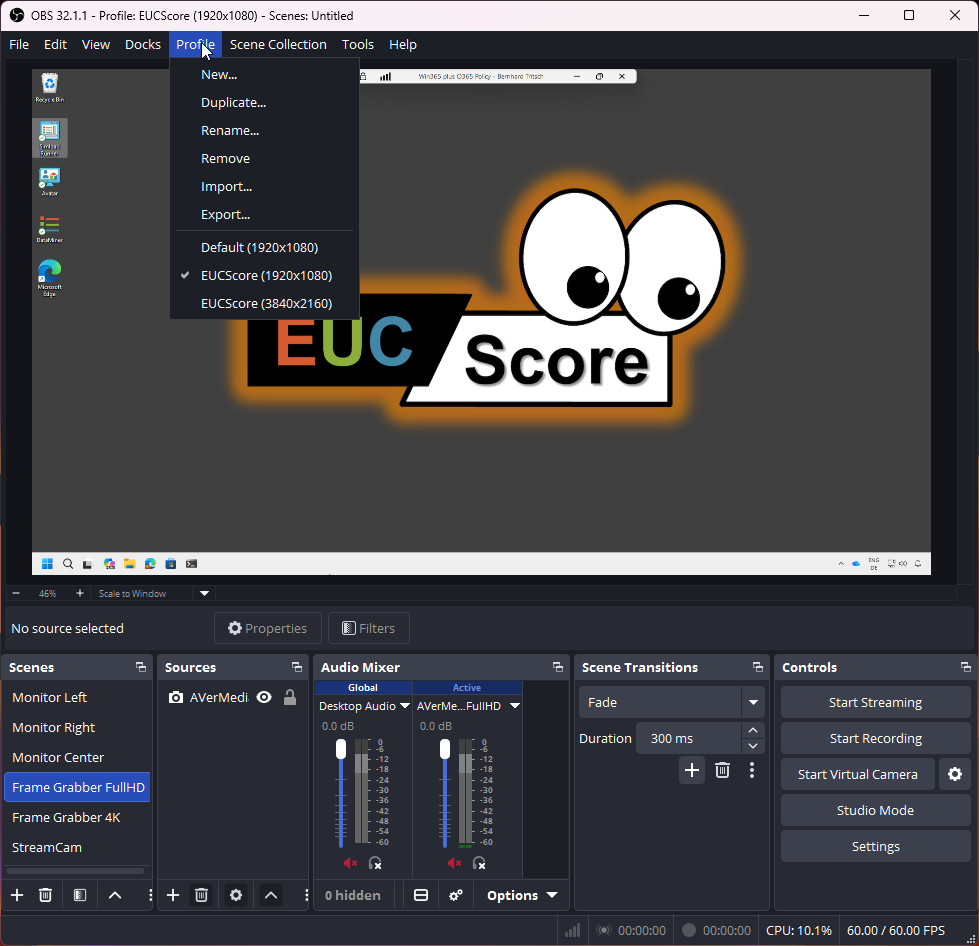
The first OBS Studio configuration step is to go to the Scenes dock and create a new scene with a meaningful name. In this example the scene name is "Frame Grabber FullHD". This scene now needs to be assigned a source. This is done via the plus sign in the bottom left corner of the Sources dock while the correct scene is selected in the Scenes dock. A frame grabber belongs to the "Video Capture Device" source category and must be initially created as a new source. Again, a meaningful name must be assigned (not the same as the scene name), and finally, the correct frame grabber device must be selected from the list.
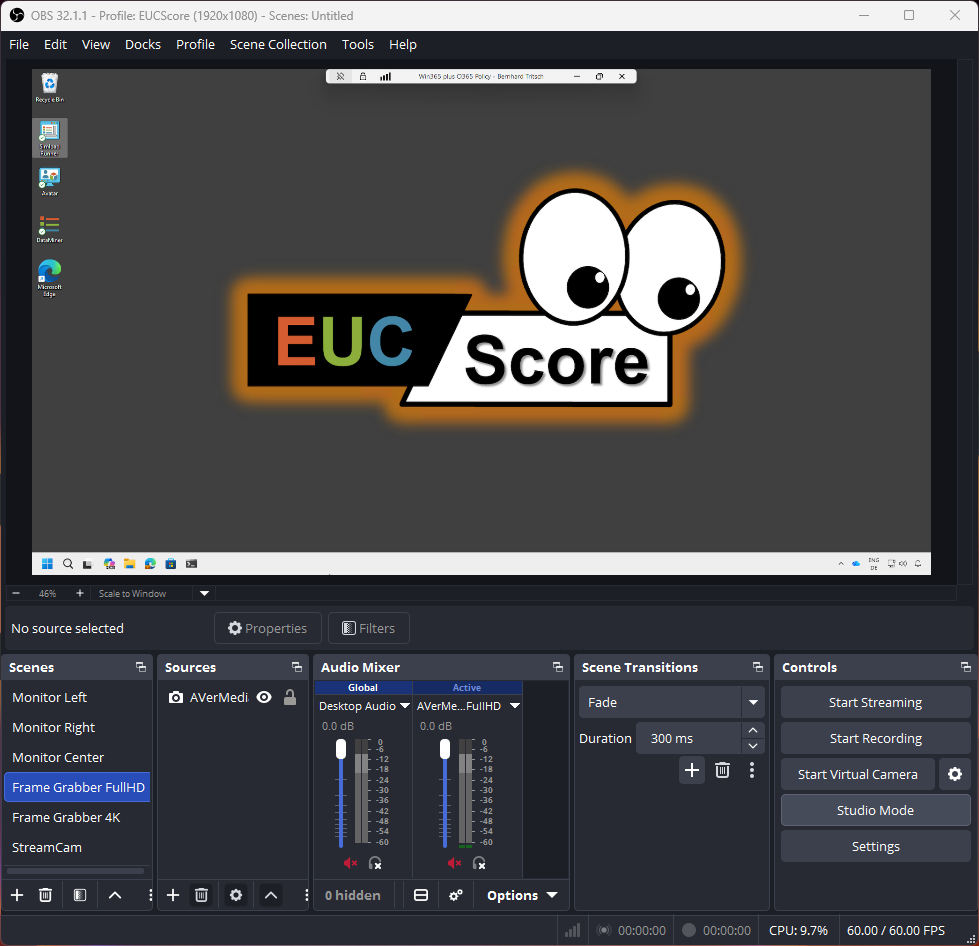
Now the OBS Studio console should look something like the image below. As you can see, there are also scenes for monitors (= Display Capture) and other Video Capture Devices.
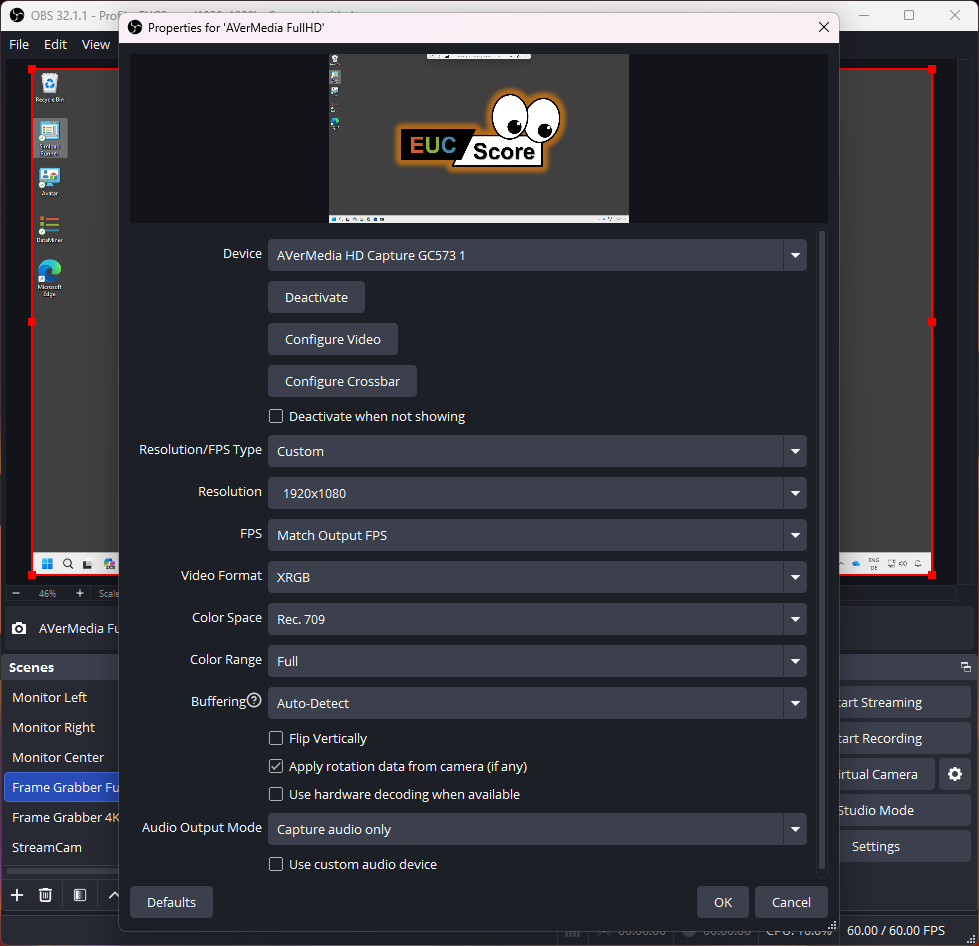
Now it's time to check and adjust the frame grabber (AVerMedia FullHD) source properties. Here are the recommended settings:
Now it's time to create an OBS Studio profile for each frame grabber option, such as full HD or 4K resolution. A profile saves configuration settings, allowing OBS Studio users to switch between different setups for recording. The active profile is always displayed in the OBS Studio title bar.
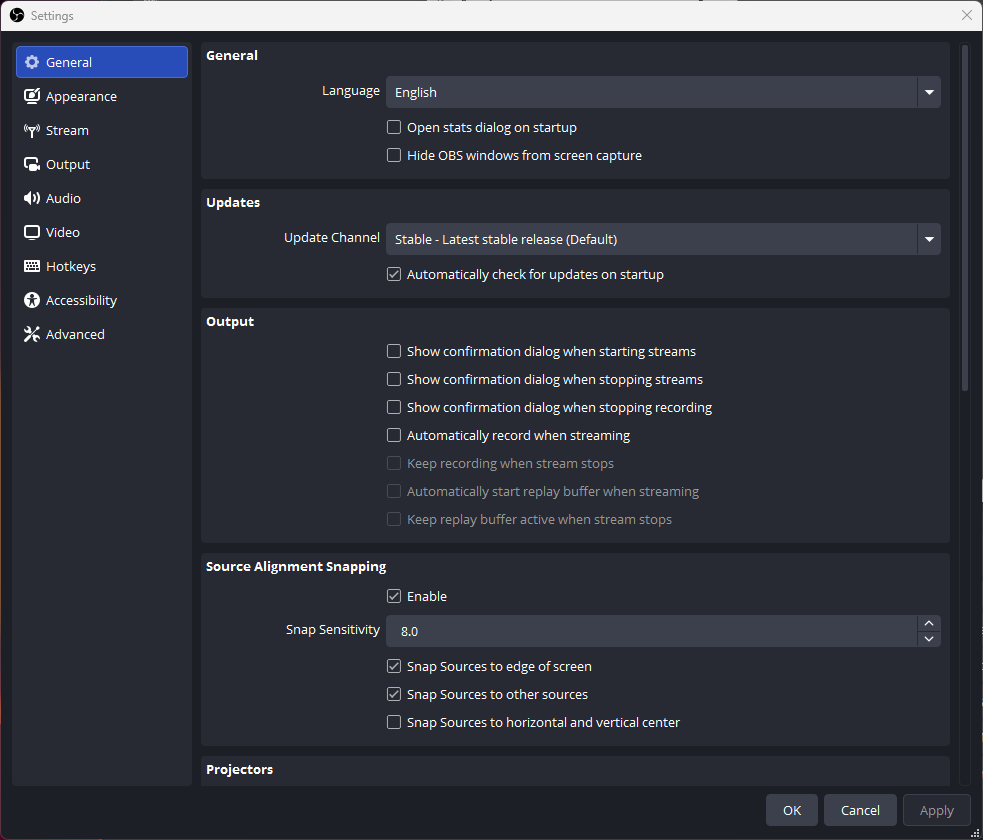
The "Settings" button in the Controls dock opens a dialog window with tabs representing different sections. Each section allows you to change the settings associated with the active profile. The following are the recommended settings for the best screen recording quality without generating tremendously large video files.
No changes are needed in the General section if you want to keep the standard workflow settings.
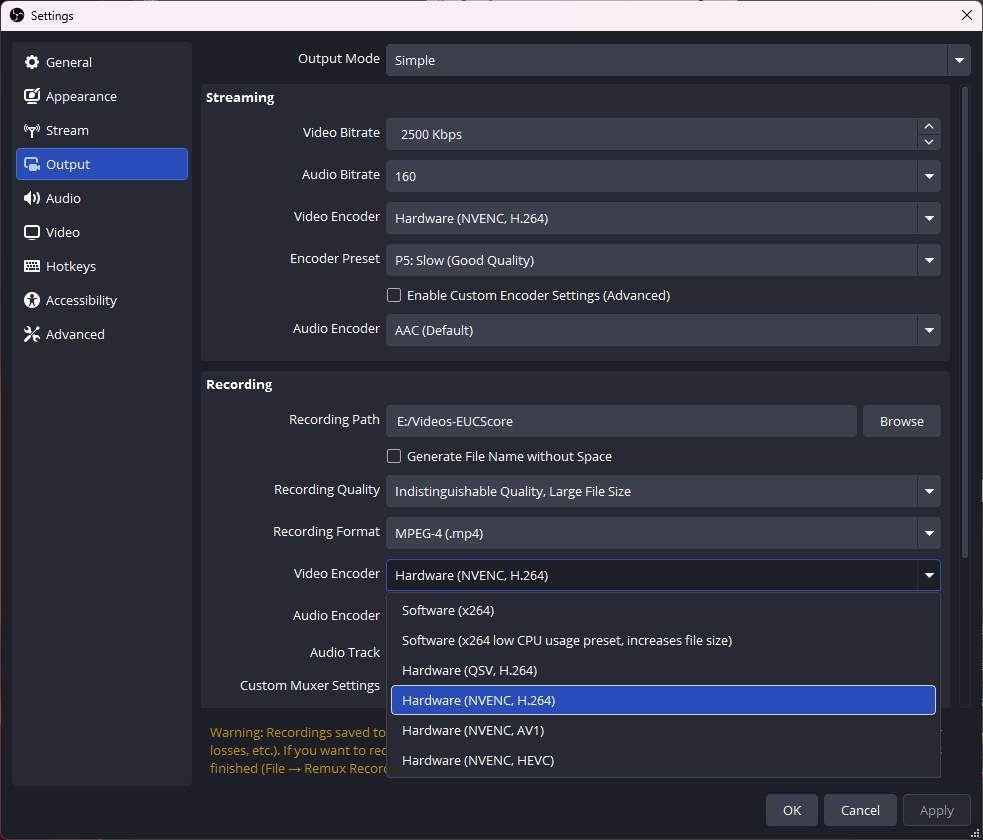
In the Output section, only the Recordings settings need to be configured. The Output Mode should remain set to Simple as there is no need for advanced encoder control at this stage. The Streaming settings are irrelevant for screen recording.
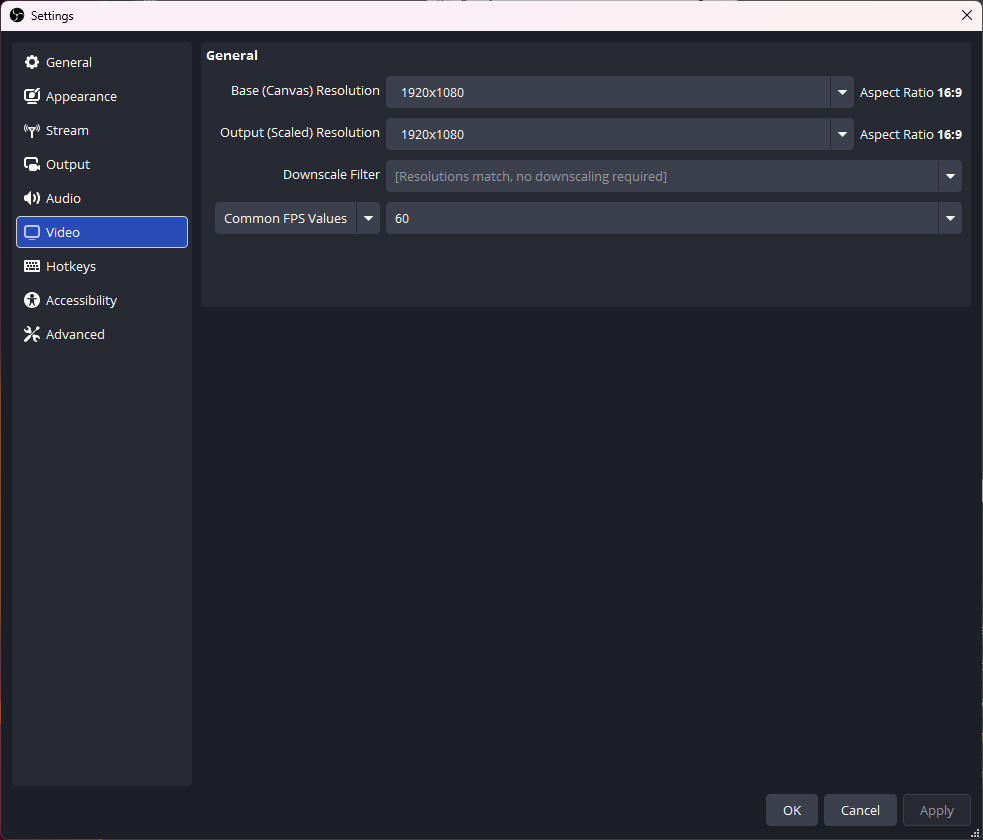
Below are the recommended settings in the Video section, representing the full HD resolution and a 60Hz frame rate.
The recommended hotkeys are CTRL+R for Start Recording and CTRL+X for Stop Recording. (Equivalent to STRG+R and STRG+X if you have a German keyboard)

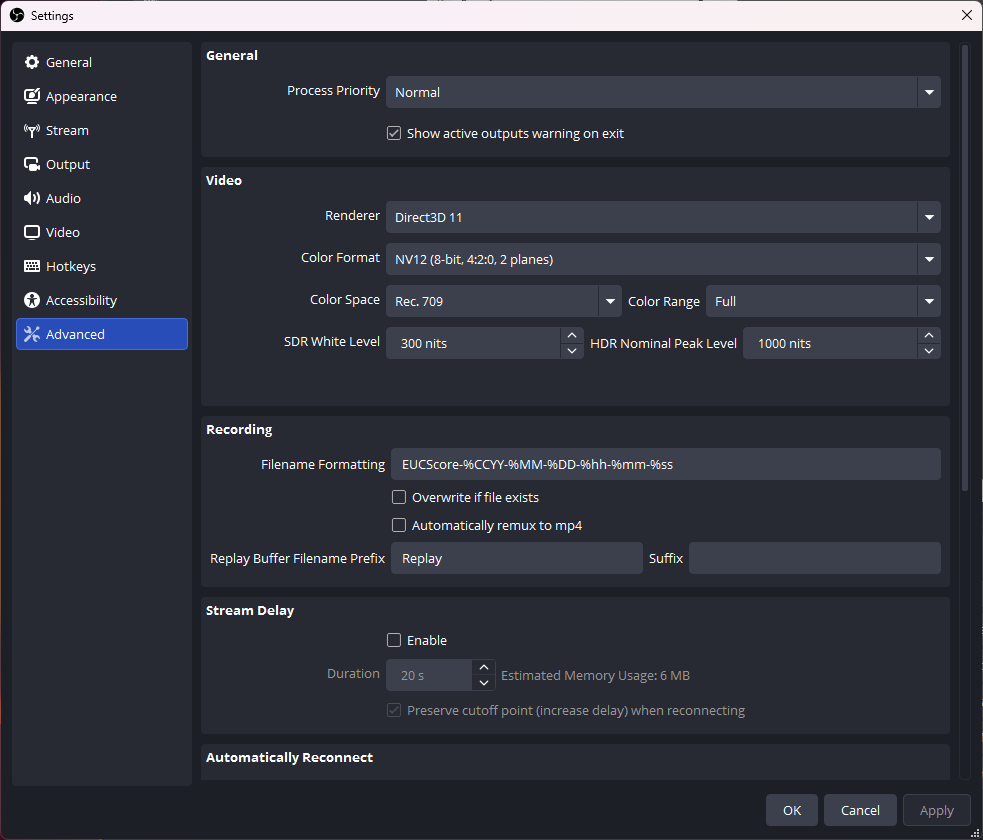
The Advanced section contains important settings for the video color space and the file name formatting.
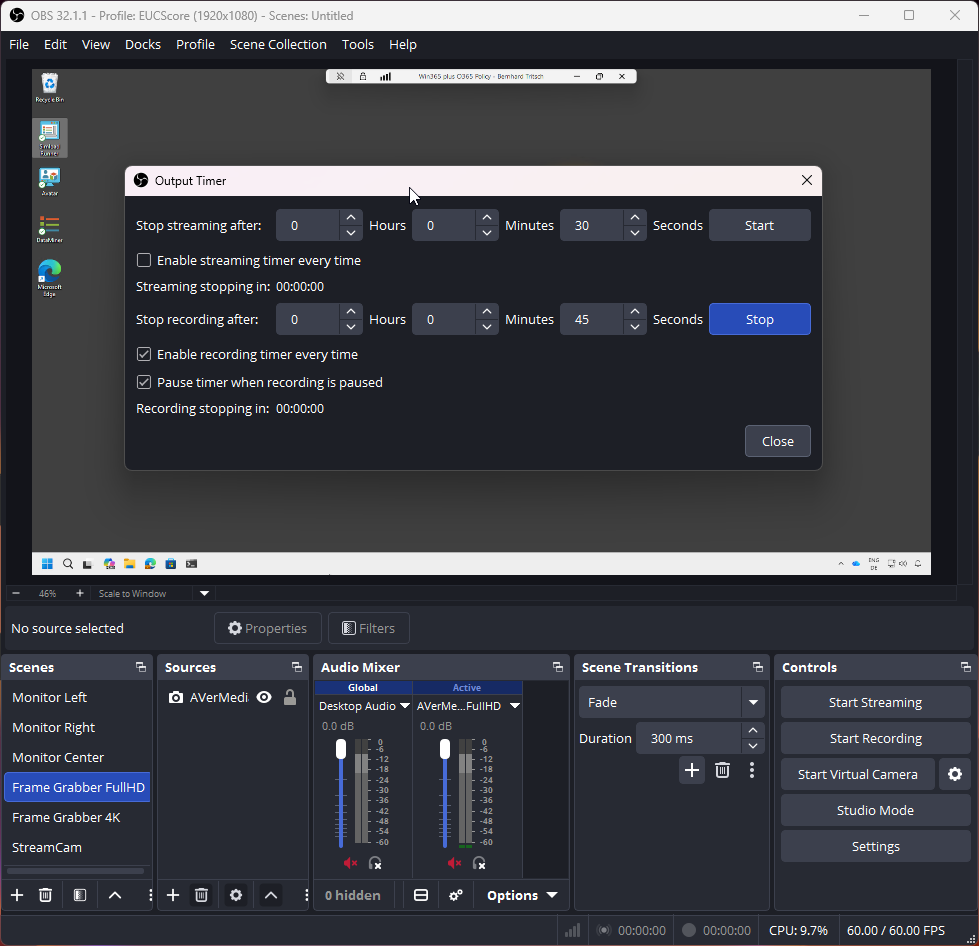
OBS Studio includes a native Output Timer tool in the "Tools" menu to automatically stop recording after a set duration. Simloads typically have a runtime of 45 seconds. If the Simload and screen recording are started simultaneously, the "Stop recording after" setting combined with the checked "Enable recording timer every time" option, as shown in the image below, ensures that the recording stops automatically after exactly 45 seconds.
CAUTION: This setting affects all profiles!
Finally, it is important to check whether the OBS Studio preview window with the signal from the selected frame grabber shows the correct alignment and orientation of the source screen. If this is the case, then the recording can be started by clicking the "Start Recording" button or by pressing the CTRL+R key combination.